Saturday, May 14, 2011

Bacterial Butchery

Today, I’ll turn to some practical stuff which we in fact did during lab sessions. Our bacteria strains (in my case Elza) were to be examined with various tests. Now, I present you some of these.

There are many bacteria which synthesize and secrete so called exoenzymes. These are large protein molecules that have an essential purpose in appropriate bacterial metabolism. Microbes require a wide range of nutrition which is often hard to access for them. Most of these aliments are biopolymers, such as amilose and amylopectin (the components of starch), DNA, or casein (the main protein component of milk), fats, etc. These are called polymers, because they are constructed of lot (poly) of repeated molecular segments constituting to their enormous size. It is a bit sloppy comparison, but if you have ever been in a hurry and tried to eat something in seconds, you must have experienced how hard it is to send down huge chunks of food on your throat. It is kind of the same with bacteria, they can’t take up extreme sized molecules at once. Just as you better use a knife to slice up a cake before biting in it, they need these exoenzymes to do some of the cleaving job for them. The word exo- refers to the notion that these enzymes are transported into the ‘outer world’ and that the partial degradation of biopolymers are done outside the cells.

The result of a positive casease test. Those crosses are the
bacteria we inocluated on the Petri. That transparent area
is due to the degraded casein.
So, our first experiment was to test whether Elza secretes casease, an enzyme responsible for degrading casein (milk component). In our Petri dishes, we used a special medium, it had some agar in it to ensure the jelly-like consistency but the most important part was that it had some milk dissolved in it which creates a pale, white, blurry kind of appearance. What we did, was basically placing some bacteria (using our sterilized stick) onto the plate and incubating them at 28 Celsius for a week. In case if our cells secreted casease we have expected to see a transparent ring around them which would indicate the degradation of casein, the agent of the initial blurriness. However, this whole thing is a bit more complicated as we might get mislead if the casein degrades into para-casein. This degradation isn’t done by the bacterial casease, although it leads to the clearing of the Petri. We solved this problem by pouring a little mercury(II) chloride and hydrogen chloride solution onto the plate, which resulted in the precipitation (turning blurry again) of both casein and paracasein. Therefore, we could only see transparent areas where bacterial casease was present and degraded all forms of casein. In my case, there was no transparent skirt around Elza, so she isn’t capable of producing casease.

Agar dish containing blood. In the lower right corner you
can see an alpha hemolyis.
A second test I’d guide you through is not so ‘innocent’. It is done on agar Petri plates containing blood, which medium is commonly used for determining distinct microbe species. Some of them are able to degrade red blood cells (a process called hemolysis), some of them not. Those who have this skill can even do it in two different ways, called alpha and beta hemolysis. The alpha way of breaking down blood is also named ‘partial hemolysis’ as the red color of the blood doesn’t clear up totally, you can rather experience a brownish-greenish area around the bacteria. This is due to the peroxide production of those kinds of cells; the peroxide oxidizes the hemoglobin (the most important oxygen carrier molecule of red blood cells) and that gives the greenish color. The beta “hemlyzers” are more accurate, their exotoxin called streptolysin degrades red blood cells completely, hence results in a transparent circle around them. The process of the experiment was just placing bacteria on dishes and incubating them for a week. We tested E. coli, Streptococcus pyogenes, and all the unknown strains. For the S. pyogenes we observed beta hemolyis, the E. coli didn’t show any interest in degrading blood and there were a couple of the unknown strains who appeared to be doing alpha hemolysis.

Here are the skyscrapers of 'test tube city'  we used
for the plenty of other experiments in order to characterize our strains.


Sunday, May 1, 2011

Fearless fungi

I had to realize, we had an extended break so there was no class this week either. Therefore, I'll tell you about an exciting story I've read. My flatmate wants to be a mycologist (a biologist whose main focus is on fungi) and he drew my attention to a phenomenon which is in connection with microbiology. As this discipline deals with almost anything that is on the 'small scale' there are many fungi within our scope.

Fruit body of the Amylostereum areulatumSource.
If you have read the article about the autumn leaves on Small Things Considered, this topic will not be totally new. What I intend to present is another way of symbiosis between an animal and a tiny organism. There is a certain wasp called the Sirex noctilio  which has much to do with fungi, namely the Amylostereum areolatum. As all insects, this Sirex goes through metamorphosis, it has clearly distinctive life stages in which the animals differ completely in their appearance. First they lay their eggs which later develop to larvae (just think of a caterpillar) vaguely said 'after a while' these larvae create a layer around themselves and form a pupa. As the animal inside undergoes many structural changes, this berrylike thing hatches and the adult wasp, moth, etc. reveals itself. We call the adult insects imagos. 

Tunnels made by the larvae. Source.
So, the imagos of this species lay their eggs with a special tool, an ovipositor (an egglaying tube) into a tree's trunk. There is a special sack in the imago's (females only) body which is connected to the tube where the eggs run out of the insect's body. This sack is the so called mycetangium containing fungi cells. As the eggs 'roll out' into the tree trunk, these fungi attach to them. There are many cases when the imagos create tunnels inside the tree, but now it is different. It is the  Sirex larvae that make their way inside the tree. However, they require the presence of the Amylostereum because they cannot digest cellulose and lignin (both are components of the plant cell wall). This shouldn't be new for you, just consider herbivorous animals. They also have many microorganisms dwelling in their guts, in order to digest cellulose. Furthermore, we don't need to go that far! We humans have a plethora of bacteria within our intestinal tract for similar kinds of purposes. So! Here, it is the other way around, these digestion helper guys are outside (!) the animal. As the larva crawls its way in the tree, it spreads the fungi onto the tunnels' walls. As the fungi begins the degradation of the tree tissue the tunnels become full of accessible food for the larvae.

It is interesting that the imagos have nothing to do with fungi during their lifetime, so every female must gain a fungi population within their body in their larval stage. So, during the pupal stage and until egg laying they keep their fungi fellows in their mycetangium (which produces some essential mucus for keeping the fungi alive). 

Sirex noctilio. Source.
But why is this good for the fungi?? The tree bark serves as a fence for the plant in protecting it from diseases. This ovipositor tube of the insect is a perfect tool for delivering not just the eggs but the fungi straight into the inner part of the tree trunk. Moreover, these tunnels serve as an ideal habitat for the Amylosterem, lacking any competitor fungi species. Think back to our lab practice, there were many times when we had the goal to create populations of only ONE certain microbe species. Basically that is what the Sirex does for the Amylostereum; they are clever, aren't they? 
A. A Sirex imago
B. This is a part of the wasp's abdomen,
containing the mycetangium (round bag) and the outer 'stick'
is the ovipositor which is pierced into the tree trunk.
C. The mycetangium from a closer look. The inner vesicle contains
and produces the mucus, in the outer part you can see fungi
cells
D. Fungi cells in themselves.
This picture is from the book: Erzsébet Jakucs and László Vajna:
Mikológia


Saturday, April 23, 2011

More and more microbiology

Source.
As it is spring break now at the university, I decided to share some links with you.

My first close encounter with microbes was at a site called Small Things Considered. You might ask how a website can make a close encounter to someone, but if you start reading that blog you'll see how capturing and informative it is! I had my first microbiology lecture only last semester, but reading this blog served as an aperitif before beginning my studies!
About a year ago, I was surfing on the internet and stumbled into one of their posts which occurred to be quite mind-boggling. It is about a phenomenon that as autumn arrives there are some leaves which do not turn entirely yellow, rather have some patterns of green remaining in them. It seems that there is not simply a bacteria operating behind this incident. The microbe responsible for keeping patches of the leaves green and alive lives in the gut of a moth's larvea! This larvae utilizes the microbe for stimulating plant tissue to keep on photosynthetizing, therefore supplying the moth's larvae with nutrients..  Read the whole article here!
If you'd hear news on microbiology from true professionals, than this blog is a must for you!!


Here is a website I came across quite recently. I'm still in the process of discovering it, but by now I can ensure you that it is definitely worth checking! It approaches microbes from a very easily digestible and understandable way. Have fun!
http://www.microbiologyonline.org.uk/

Now, here is a book I adore. Though we study microbiology in Hungarian, our teachers advised to check this book out. I was fortunate enough that a dear friend of mine owns a copy and he was willing to lend it to me. It is a very detailed overall book on microbiology, containing all the recent discoveries! It is designed for rather those who study/intend to study microbiology at university level.
Brock Biology of Microorganisms by Michael MadiganJohn Martinko 

Sunday, April 17, 2011

I like to move it, move it!

Bacteria with typical lophotrichous flagella.
'lopho' means tuft and 'trichous' means hair.
Source.

Last class along with the various staining procedures we had a look at how bacterial cells get from points A to B. Not all bacteria are motile; however, those that are have various ways to do so. They bear flagella or cilia, and some of them use neither of these, but rather glide.

The experiment we did in class was pretty simple. We had Pseudomonas sp. and Proteus sp. on indented agar in test tubes. We cleaned some microscope slides and placed a drop of water onto them, then used our sterile stick to pick some of the 'boys' from the agar to mix them in the water on the slide. As this suspension turned relatively homogenous we placed a very thin glass cover onto the microbe solution drop. This was important, so we could use the 100x objective which requires immersion oil.

Swarming of the Proteus miriablis Source.
The Proteus sp. turned out to be exceptionally motile. It has ‘peritrichous’ flagella, meaning there are flagella all around its ‘body’. However, these kinds of whips are capable of forming a bundle. This bunch of flagella moves coordinately and propels the cell in a particular direction. This rapid motility exhibits an amazing phenomenon on a Petri dish. If you place a colony of Proteus onto agar, it will show concentric circles. The reason for this is that the cells on the edge of the colony tend to move faster than those in the middle. These outer guys move rapidly away in all directions from the original colony. After a while they settle down and start dividing. Therefore, their daughter cells become the outer ones, rushing away to form new settlements. This kind of motion is called ‘swarming’.


Typical flagella arrangement types. Source.

Unfortunately, we had no device for recording these motions at the university. Though, I found some intriguing pieces of footage on YouTube which I recommend you watch!


This third one is just to show you what we experienced when we dipped a piece of glass into the immersion oil we use for microscopy. The oil's refractive index is the same as glass' so you are unable to distinguish the two.

Sunday, April 10, 2011

Bacteria worth munching on

Here, I present a mostly unknown aspect of the sauerkraut making process. I’ll guide you to the backstage where you can meet the microbes responsible for creating this tasty side dish. (Well, it isn’t only a side, there are gorgeous meals made from it. Here is one for those who’d take a plunge in the Hungarian kitchen, presented by one of my blogger classmates.)

Leuconostoc mesenteroides. Source.
What the heck is the sauerkraut? The image of a bunch of fermented, spicy shredded cabbage leaves might not seem appealing, though it is delicious. Moreover is it healthy. I did a little research on the history of this food and discovered some intriguing data. It is thought to be the Chinese who ‘invented’ it while building the Great Wall. Later, it conquered Europe, benefiting sailors the most. During longlasting sea journeys the lack of vitamin C occurred quite regularly, resulting in a nasty disease, scurvy. The sauerkraut can be stored without much extra care for months. Therefore, it was perfect for seafarers to have it with them as a depot of vitamins. Well made sauerkraut has a long lasting expiration date due to its low pH and high salt concentration which not many microbes can withstand. The exceptional few who can are the ones who create the conditions, in which the fermentation results in cabbage becoming sauerkraut. Let’s have a closer look at them.

The human factor in making sauerkraut starts and actually ends with: slicing up the cabbage, mixing some salt and spices with it, and placing this mess into a container. Not to be forgotten, it is crucial to place some weight onto it, so it is compressed and relatively air free, providing anaerobic conditions. If you are still hesitant about how to do it, there are plenty of videos on this topic, so you cannot blow it.

Traditional barrel for making sauerkraut. Source.
Along the approximately five weeks of the fermentative process a nice timeline can be set about the alternation of different bacteria who contribute to the finest sauerkraut. Four main characters are to be introduced. All of them require water for living, but where does this come from, as we don’t put any into our sour cabbage making bucket? It is the salting step which ‘sucks’ out the water from the cabbage. Imagine a tin of salt that you have left open for weeks! Usually the tiny fine grains of salt aggregate into much bigger sized particles. This is due to the so called ‘hygroscopic’ nature of salt (NaCl). In that case it ‘binds’ the water from the air, forming lager salt chunks. This analogy works with the cabbage; its cells contain heaps of water which is driven out by the salt. In that form, water is more accessible for bacteria, which results in the growth of members of the Enterobacteriaceae family. As mentioned before, high salt concentration serves as a barrier for many microbes to stay alive in our cabbage mixture. Only the Gram-positive ones endure the 2.5% NaCl concentration. The Enterobacteriaceae boys utilize the solute oxygen creating favorable conditions for the Leuconostoc mesenteroides the initiator of the fermenting process.

Lactobacillus plantarum. Source.
The Leuconostoc synthesizes carbon-dioxide, lactic-acid, and alcohol. The acid lowers the pH of the whole solution, making it even more selective. As the lactic-acid concentration increases the two members of the Lactobacillus genus, the L. brevis and the L. plantarum start exercising their beneficial effects. These guys produce even more lactic-acid, creating an even lower pH. And giving the taste (among all the spices you used) to the cabbage. The L, plantarum is quite popular in other food making processes, too. For example, pickles, some cheese, kefir (called by one of my best friends as ‘rotten milk’) and stockfish require this microbe to be present during their creation.

"Side-effects of staining bacteria."
A picture we took at class and I forgot to include in my post last time. 
What we did at class, was that after applying the 50 gramm salt and some spices to the 2 kilos of shredded cabbage we placed a plastic bag of pebbles onto it, then closed it into a bucket. Over 5 weeks we kept measuring the pH, it was unexpected that it dropped to 3.8 right after one week, and remained the same until the end… 3.8 is right, but we thought it would be a slower process. After the five weeks we put some of the juice onto microscope slides and stained them with Gram, make a guess whether it was positive or not! J

Wednesday, March 30, 2011

Elza wearing makeup - Stained to death

This week I was able to have a closer look at Elsa. Although she is quite attractive in the rays of the setting sun as the white layer of her swirls into a piece of agar, an entirely new dimension has opened up in the last class. We practiced some dying procedures and used microscopes to observe our samples.

Elza stained with Safranin. These pics were also taken by me
it was quite fun, using a microscope and a phone.. :)
I guess, the tininess of microbes hasn’t been made clear yet. To start with, the word ‘micro’ meaning small, does have a precise definition in connection with measurement. In everyday life we don’t need to consider smaller distances than millimeters, or smaller weights than a gramm. However, the scale doesn’t end here! One micrometer is exactly the one millionth of a meter, a microgram is a millionth of a gram. It might turn out to be even more astonishing, if you fetch a piece of paper and write down: zero, point, five zeros, one. In meters this is the number for one micrometer! Showing allegiance to their name, most microbes fall between 0.5-5 micrometers. Using a 100x magnification objectives I was able to see individual cells of Elsa and try to deduce some information on their morphology.

The proof that Elza is Gram positive. If you enlarge,
you can see tiny white balls inside some cells,
these are the endospores.
Over the past almost three years it has occurred to me that in biology the funniest and also most beautiful names are of dyes. There is a wide range of them used for staining animal tissues, plant tissues, microbes, certain cell components, etc. Here are some names I especially adore: Malachite green, Azocarmine blue, Soudan black, Nile blue, Hematoxylin-Eosin, Xylene Cyanol, Ponceau, and this list goes on and on. I aim to show you only one staining process, probably the most famous one in microbiology, which was invented in 1884 by a Danish scientist. Using this so-called Gram staining enables us to distinguish between two main categories of bacteria. Actually, these categories were created on the basis of this staining… J

This method exploits the fact that there are two most prevalent types of bacterial cell walls. Due to their different nature of molecular components some of them are negative, some are positive to Gram staining.

Stained slides. We put a drop of immersion
oil onto them, then used the 100x objectives
on our light microscopes.
Here is an abridged protocol we used. First, we eliminated all fats and dirt from our glass slides, which we use as a storing surface for our samples. We did this by dipping them into 96% alcohol, than burning it off with the Bunsen-burner. Then we applied a drip of bacteria suspension and spread it, so almost the whole slide was covered with microbes. After letting them dry onto the slide (which process was accelerated by carefully using the heat of the burner) we applied the first dye, the Crystal Violet. We let them alone for one minute, than washed the stain off with water and applied the second color that contains iodine. The iodide ions are able to form a complex with the Crystal Violet. Until now, all kinds of bacteria behaved the same way, having a deep purple color. The distinctive part came when we used absolute alcohol to remove this Iodine-Violet complex from the cell wall. Those who were submissive enough to obey and let their colorful dress go, are called the Gram negative boys. As a final step, we applied a dye called Safranin which was able to give color to only the Gram negative cells, as the place reserved for stains had already been occupied in the Gram positives by the Iodine-Crystal Violet complex. We were able to conclude that all pinkish-reddish cells gained their color due to the Safranin, so they bear the name Gram negative. Those rocking with the deep purple are the positives. It shouldn't be missed that there is a quite unfortunate 'side-effect' of these staining processes. Our samples need to sacrifice themselves for the sake of science... But don't worry, I have passaged plenty of Elzas to a new agar medium, so we will be able to be mesmerized by her beauty next week.
A, is the process of Gram staining and results on both negative and positive microbes.
B, the most typical microbe shapes. Source.

As I have already informed you, our eventual task by the end of the semester will be to precisely characterize our chosen species, in my case Elsa. I compared her to all other samples made by the class and she resembles much the Bacillus subtilis… She is Gram positive, and has endospores. However, this is far from being enough for characterization, it does pretty much restrict the choices available.

Monday, March 21, 2011

Hold your breath!


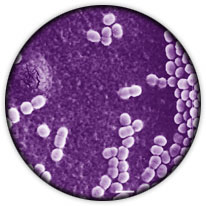
This gorgeous creature is a Clostridium species. There are about 100 types of them.
Some living freely, some being pathogenic. This one in the picture is the Clostridium difficile,
which starts thriving in your gut after you used antibiotics to kill all the others. Then this guy
realizes that the place is free, then swings into motion, which you usually realize
by having antibiotic-associated diarrhea. Source.


This post aspires to give a brief overview on my first encounter with anaerobe microbes. Basically any organism, which doesn’t require oxygen for living is called anaerobic. There are certain categories, for example obligate and facultative anaerobes. Apparently, the obligate guys made up stricter rules for themselves. They love being without oxygen so much, that if they come across any amount of oxygen, they stop growing and finally give up living. The facultative ones are cleverer, (this is of course an exaggeration, there are instances when being obligate is more adaptive for one) they are happy growing without oxygen but don’t mind its prevalence in their neighborhood (for a certain level).

Schematic structure of an endospore. These
several layers are responsible for
saving the DNA from UV light and high
temperatures, for instance. Source.
The subject of our experiment was a genus (this is just a taxonomic category, which contains very similar species) called Clostridium sp. These microbes fall into the obligate category, also having a special feature: they produce endospores. This characteristic was the one we needed for selection, I’ll explain you why. Endospores are very inventive tools for surviving harsh environmental conditions, lack of food, draught, chemicals, UV light, extreme temperatures, etc. The endosporal life stage might be compared to the hibernation of let’s say grizzly bears. The metabolic activity (all biochemical reactions that function to produce energy from food and to use energy for any kind of processes, for instance motion) of bears changes and slows down, in contrast the these endosporic microbes go completely dormant, by arresting all metabolic pathways. Sporulation occurs relatively quickly, it involves secretion and formation of several layers, coats around the cell plus the inner structural changes, for instance DNA condensation (it gets more dense, packed into a smaller volume). Eight hours are sufficient for a bacterial cell to develop an endospore. Due to this completely dormant, inactive phase it is not only one winter, as in the case of bears, that such kind of organisms can survive.

This is the hot bath, where we
eliminated everybody
except for Clostridiums.
Now, a little history: in 1947 Clostridium endospores were put into a sterile medium and weren’t opened until 1981. It didn’t take more than 12 hours for the bacteria to reactivate themselves and start cheerfully thriving, 34 years later! If that won’t be enough for you, there are further, much bolder claims. In the 1990s a 25-40 million years old bee, preserved in amber was found. In itself that wouldn’t be exceptional at all, but some scientists isolated endospores from this oldish bee’s gut. Believe it or not, they were able to bring those bacteria back to life, by simply putting them into appropriate culturing medium!

This is and anaerobic 'booth'. This elephant trunk like thing
is where you put your hands and start operating inside that
box. It keeps oxygen out, so is perfect for experiments
done with anaerobic bacteria.
Our task in class was to selectively grow this famous Clostridium. Its name has a Greek origin, it refers to its rod like shape. First, we needed to eliminate all other species from our bacteria culture. We did it by placing our Clostridium suspensions into a hot bath, they stayed there for 10 minutes at 80 Celsius degrees. That process yielded us a suspension full of dead microbes, except for those who bore endospores. (Endospores can survive even 150 Celsius degrees). After that we used a syringe to place a little amount of this suspension to the bottom of an empty Petri dish (no agar!). We melted some agar/culturing medium solution and poured it over our samples. After mixing them, we placed the top of the Petri onto the still warm and soluble agar upside down, so it stuck to it. This tightly fitting construction, called the ‘Brewer plate’ was able to expel ‘all’ oxygen particles, letting our dear little Clostridiums to start reactivating. I can’t wait for Tuesday to see what they ended up with! 
As I promised, here is my little Elsa. You can observe her better if you enlarge
the picture. She is that white cream like guy on the surface of the yellow agar.
If you are careful enough you can notice how she started going deeper into the agar,
it is like little roots going down from the indented surface.